
This blog post will detail how to set up and use the Camera Module v2 on a Raspberry Pi3 running Ubuntu Mate.
First off, open your RPI3 if it’s in a case to expose the motherboard. Locate the camera port. It should be the white horizontal strip in front of the ethernet cable port. Take your camera v2 out of the anti-static bag (should always be in the bag when not used). Gently raise the white strip up and push it backwards. Making sure that the blue side of the camera module faces towards the ethernet port, insert the camera module. 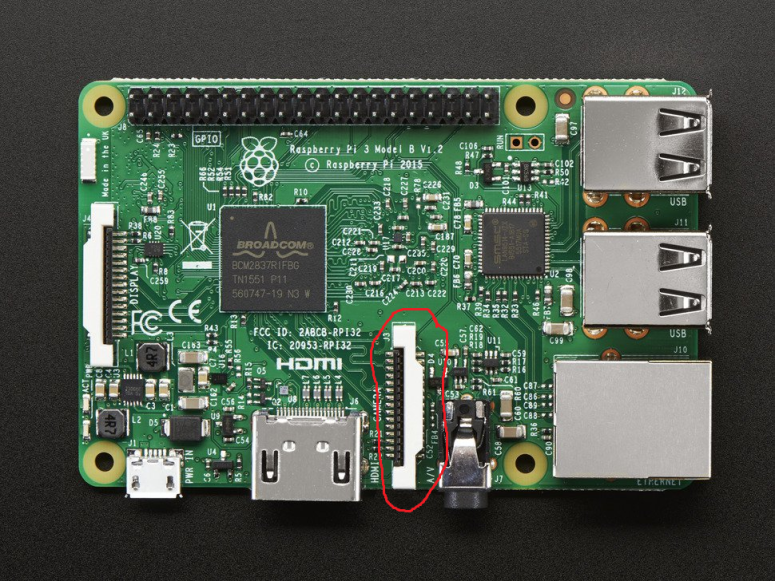
Now that the camera module is installed, you can start using it. However, some of the built in RPI3 camera commands only work on the default operating system Raspistill. Since we are using Ubuntu Mate, you have to modify the file “/boot/firmware/config.txt”. Add the line “start_x=1” at the bottom, save the file, and reboot the system.
You can grab an image from the camera and save it to your computer using the following command on the Ubuntu Mate terminal. Where “example.jpg” becomes the image file’s name.
raspistill -o example.jpg
Similarly, you can get a video from the camera and save it to your computer using this command. “video.h264” becomes the name of the video file and the number following “-t” is how many milliseconds the camera will record for. In this case, it is 10,000 milliseconds so the video would be 10 seconds long. Additionally, the camera module can only save videos in a “.h264” format.
raspivid -o video.h264 -t 10000
To get uninterrupted live camera feed, you can use the python code below to keep a continuous video going.
#!/usr/bin/env python

#necessary libraries
from picamera.array import PiRGBArray
from picamera import PiCamera
import time
import cv2

#initiliaze the camera and grab a reference to the raw camera capture
print ('hi')
camera = PiCamera()
camera.resolution = (640, 480)
camera.framerate = 32
rawCapture = PiRGBArray(camera, size=(640, 480))

#allow the camera to warmup
time.sleep(0.1)

#capture frames from the camera
for frame in camera.capture_continuous(rawCapture, format='bgr', use_video_port=True):
 #grab the raw NumPy array representing the image, then
 #initialize the timestamp and occupied/unoccupied text
 image = frame.array

 #show the frame
 cv2.imshow('Frame', image)
 key = cv2.waitKey(1) & 0xFF

 #clear the stream in preparation for the next frame
 rawCapture.truncate(0)

 #if the q key was pressed, break from the loop
 if key == ord('q'):
 break
