
This blog post describes how to integrate Raspberry Pi Camera v2 with a Raspberry Pi 3 running Ubuntu MATE 16.04.
With Raspberry Pi 3 powered off, place the camera ribbon into the camera connector nearest to the Ethernet connector with the side showing the conductors facing away from the Ethernet connector.

After the connection is secured, power up Raspberry Pi 3. Install raspi-config and rpi-update:
     sudo apt-get update
     sudo apt-get upgrade
     sudo apt-get install raspi-config rpi-update
Run raspi-config to enable camera:
sudo raspi-config
You will get the below screen:
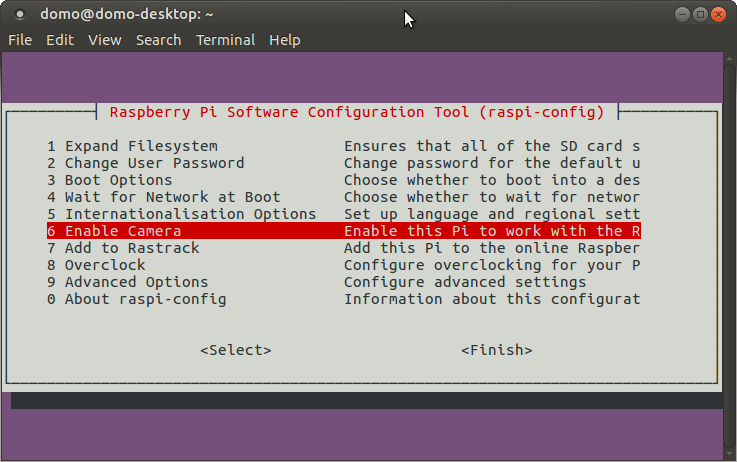
Enable camera, finish, and reboot. Next, make sure /boot/config.txt has the following enabled:
     start_x=1
     gpu_mem=128
Now run sudo rpi-update to update firmware.
If you’re getting the below error,
     mmal: mmal_component_create_core: could not find component 'vc.camera_info'
     mmal: Failed to create camera_info component
     mmal: mmal_component_create_core: could not find component 'vc.ril.camera'
     mmal: Failed to create camera component
     mmal: main: Failed to create camera component
     mmal: Failed to run camera app. Please check for firmware updates
when running raspistill or other userland apps, then try downgrade to an older version below that worked for me:
sudo rpi-update 667cfabe63bc663383559ef88317e86f9bd41e45
Applications like raspistill are part of userland code that can be cloned and built:
     git clone https://github.com/raspberrypi/userland.git
     cd userland
     ./buildme
     touch ~/.bash_aliases
     echo -e 'PATH=$PATH:/opt/vc/bin\nexport PATH' >> ~/.bash_aliases
     echo -e 'LD_LIBRARY_PATH=$LD_LIBRARY_PATH:/opt/vc/lib\nexport LD_LIBRARY_PATH' >> ~/.bash_aliases
     source ~/.bashrc
     sudo ldconfig
     sudo reboot now
Now you can test your camera installation by running the following command:
raspivid -p 0,0,640,480 -t 0
and something like below should result:

